Away3Dはオープンソースのリアルタイム3Dエンジンだ。もともとはFlashプラットフォーム向けに開発された。そのAway3Dエンジンが
その初めてのお題は、
Away3D TypeScriptライブラリを使う
まずは、

サンプルコードなどAway3D TypeScriptを試してみるには、

HTMLドキュメントには、
<script src="lib/awayjs-core.next.min.js"></script>
<script src="lib/stagegl-core.next.min.js"></script>
<script src="lib/stagegl-extensions.next.min.js"></script>
<script>
function initialize() {
  // 初期設定
}
</script>
<body onload="initialize();">Away3Dの3次元表現で用意しなければならないのは、
- Away3Dで用意しなければならないもの
- 舞台:Viewオブジェクトで3次元空間の表示領域を定める
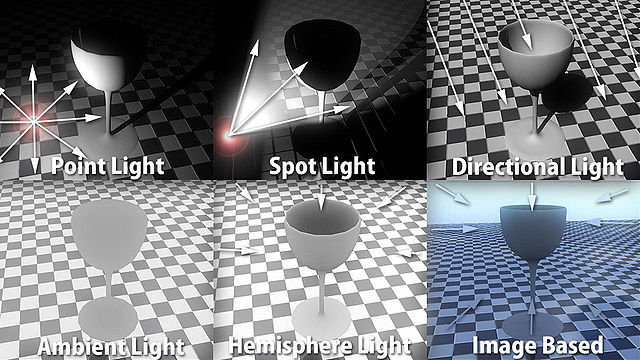
- 照明:光源のオブジェクトで3次元空間を照らす
- 役者:物体のひながたからインスタンスをつくって3次元空間に加える
Viewクラスで3次元空間の表示領域を定める
第1につくらなければならないのは、
new away.containers.View(new away.render.DefaultRenderer())Viewオブジェクトには、
| Viewクラスのプロパティ | プロパティの値 |
|---|---|
| width height | 表示される領域の幅と高さ。 |
| backgroundColor | 画面の背景色。デフォルト値は黒 |
| camera | 表示領域を描くために用いられるCamera3Dオブジェクト。 |
| scene | 表示領域を描くもととなる3次元空間のSceneオブジェクト。 |
Viewオブジェクトをつくって返す関数
createView(幅, 高さ, 背景色)関数
var view;

function initialize() {

  view = createView(240, 180, 0x0);

}
function createView(width, height, backgroundColor) {
  var defaultRenderer = new away.render.DefaultRenderer();
  var view = new away.containers.View(defaultRenderer);
  view.width = width;
  view.height = height;
  view.backgroundColor = backgroundColor;
  return view;
}
DirectionalLightクラスで平行光源を定める
第2に、

平行光源は、
new away.entities.DirectionalLight()もっとも、
createDirectionalLight(環境光の強さ, 光の色)DirectionalLightクラスは、
| DirectionalLightオブジェクトのプロパティ | プロパティの値 |
|---|---|
| ambient | 環境光の強さを示す0以上1以下の数値。デフォルト値は0。 |
| color | 光のカラー値。デフォルト値は白 |
| direction | 光源の位置を示す3次元ベクトルのVector3Dオブジェクト。デフォルト値は(0, -1, 1)。 |
DirectionalLightオブジェクトをつくる関数
function initialize() {
  var directionalLight = createDirectionalLight(0.25, 0x00FFFF);

}

function createDirectionalLight(ambient, color) {
  var light = new away.entities.DirectionalLight();

  light.ambient = ambient;
  light.color = color;
  return light;
}
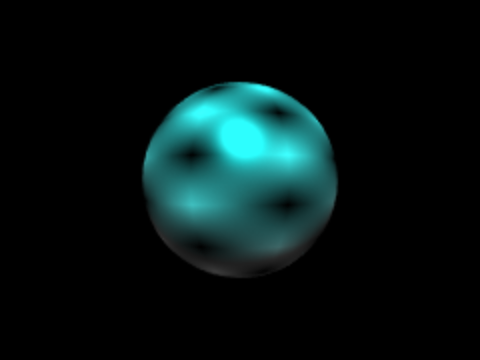
PrimitiveSpherePrefabクラスから球体のオブジェクトをつくって3次元空間に加える
舞台と照明が整ったので、
今回は球体をつくるので、
new away.prefabs.PrimitiveSpherePrefab(半径, 水平分割数, 垂直分割数)
.getNewObject()ひながたからPrefabBase.
new away.materials.StaticLightPicker(光源の配列)球体のMeshオブジェクトをつくって返す関数
var view;
var sphere;
function initialize() {
  var directionalLight = createDirectionalLight(0.25, 0x00FFFF);
  view = createView(240, 180, 0x0);
  sphere = createSphere(300, 32, 24, directionalLight);
  view.scene.addChild(sphere);

}

function createSphere(radius, segmentsH, segmentsV, light) {
  var defaultTexture = away.materials.DefaultMaterialManager.getDefaultTexture();
  var material = new away.materials.TriangleMethodMaterial(defaultTexture);
  var sphere = new away.prefabs.PrimitiveSpherePrefab(radius, segmentsH, segmentsV)
  .getNewObject();
  sphere.material = material;
  material.lightPicker = new away.materials.StaticLightPicker([light]);
  return sphere;
}
ここまで解説したJavaScriptコードをまとめれば、
View.

var view;
var sphere;
function initialize() {
  var directionalLight = createDirectionalLight(0.25, 0x00FFFF);
  view = createView(240, 180, 0x0);
  sphere = createSphere(300, 32, 24, directionalLight);
  view.scene.addChild(sphere);
  view.render();
  view.render();
}
function createView(width, height, backgroundColor) {
  var defaultRenderer = new away.render.DefaultRenderer();
  var view = new away.containers.View(defaultRenderer);
  view.width = width;
  view.height = height;
  view.backgroundColor = backgroundColor;
  return view;
}
function createSphere(radius, segmentsH, segmentsV, light) {
  var defaultTexture = away.materials.DefaultMaterialManager.getDefaultTexture();
  var material = new away.materials.TriangleMethodMaterial(defaultTexture);
  var sphere = new away.prefabs.PrimitiveSpherePrefab(radius, segmentsH, segmentsV)
  .getNewObject();
  sphere.material = material;
  material.lightPicker = new away.materials.StaticLightPicker([light]);
  return sphere;
}
function createDirectionalLight(ambient, color) {
  var light = new away.entities.DirectionalLight();

  light.ambient = ambient;
  light.color = color;
  return light;
}球体以外の基本的なかたちをつくる
Away3Dでは球体以外にも、
| ひながたをつくるコンストラクタ | 引数の値 |
|---|---|
| PrimitivePlanePrefab | 平面のひながたをつくる。 幅 ー 平面のx軸方向の長さ。デフォルト値は100。 高さ ー 平面のz軸方向の奥行き。デフォルト値は100。 |
| PrimitiveCubePrefab | 直方体のひながたをつくる。 幅 ー 直方体のx軸方向の長さ。デフォルト値は100。 高さ ー 直方体のy軸方向の長さ。デフォルト値は100。 奥行き ー 直方体のz軸方向の長さ。デフォルト値は100。 |
| PrimitiveTorusPrefab | ドーナッツ型のひながたをつくる。 半径 ー ドーナッツ型の大きさを示す半径。デフォルト値は50。 太さの半径 ー ドーナッツ型の太さを示す半径。デフォルト値は50。 水平分割数 ー 曲面の水平方向の分割数。デフォルト値は16。 垂直分割数 ー 曲面の垂直方向の分割数。デフォルト値は8。 |
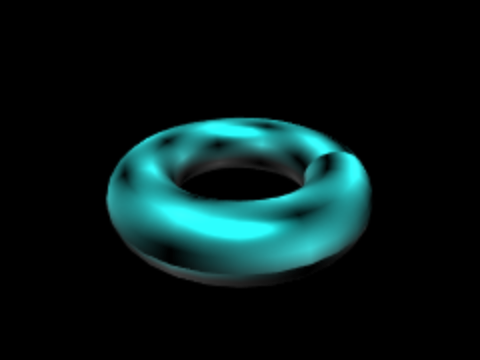
ひとつ練習として、
var torus = createTorus(300, 32, 24, directionalLight);
view.scene.addChild(torus);
前述のとおり、
function createTorus(radius, segmentsH, segmentsV, light) {
  var defaultTexture = away.materials.DefaultMaterialManager.getDefaultTexture();
  var material = new away.materials.TriangleMethodMaterial(defaultTexture);
  // var sphere = new away.prefabs.PrimitiveSpherePrefab(radius, segmentsH, segmentsV).getNewObject();
  var torus = new away.prefabs.PrimitiveTorusPrefab(radius, radius / 3, segmentsH, segmentsV)
  .getNewObject();
  torus.material = material;
  torus.rotationX = -30;
  material.lightPicker = new away.materials.StaticLightPicker([light]);
  return torus;
}
さて次回は、


