今回のお題は、
メニューのもとになる静的スタイル
まず、<body>要素に書くコードの構成だ。メニューは、class属性が"menu"の<ul>要素でリストとして組み立てる。メニュー項目をclass属性"item"の<li>要素とし、<a>要素にテキストを加えた。そして、<ul>要素全体を、class属性"container"の<div>要素で包んでいる。
<div class="container">
<ul class="menu">
    <li class="item"><a href="#">HTML</a></li>
    <li class="item"><a href="#">CSS</a></li>
    <li class="item"><a href="#">JavaScript</a></li>
    <li class="item"><a href="#">XML</a></li>
</ul>
</div>この<body>要素の記述に対して、<style>要素を加える。今のところ、<script>要素で-prefix-freeを読み込んだ
<script src="lib/prefixfree.min.js"></script>
<style>
body {
    font-family: Arial, Helvetica, sans-serif;
    background: dimgray;
}
.container {
    height: 50px;
    margin: 40px 0;
    padding: 50px 0;
    text-align: center;
}
.menu {
    display: inline-block;
    list-style: none;
    margin: 0;
    overflow: hidden;
    padding: 0;
    position: relative;
    background: linear-gradient(ghostwhite, gainsboro);
}
.item {
    float: left;
    font-size: 14px;
    line-height: 50px;
    padding: 0 35px;
    cursor: pointer;
}
.item a {
    color: gray;
    display: block;
    text-decoration: none;
    text-shadow: 0 1px 0 white;
}
</style>
メニューの背景色とテキストの影
今回のお題は、<style>要素の定めでは、class属性"menu")backgroundプロパティに、linear-gradient()関数で線形のグラデーションを加えている。おそらく気づきにくいだろうから、
.menu {

    /* background: linear-gradient(ghostwhite, gainsboro); */
    background: linear-gradient(white, black);

}

.item a {

    text-shadow: 0 1px 0 white;

}
もうひとつ気づくのは、text-shadowプロパティに影の水平・
text-shadow: 水平のずれ 垂直のずれ ぼけ幅 カラーなお、linear-gradient()関数の第1引数には、to bottom)
linear-gradient([to 方向,] 始まりの色, 終わりの色)メニュー項目の間に区切り線を入れる
メニューバーの項目class属性"item")border-leftとborder-rightで明暗の差をつければよい。まずは、
.item {

    border-left: 4px solid white;
    border-right: 4px solid black;

}
効果が確かめられたところで、:first-childと:last-childで指定してなくすnone)
.item {

    border-left: 1px solid white;
    border-right: 1px solid gainsboro;

}

li.item:first-child {
    border-left: none;
}
li.item:last-child {
    border-right: none;
}
メニューバーに外枠を加える
メニューを動かす前に、borderプロパティを用いてもよい。けれど、box-shadowプロパティを活用してみよう。影は普通ぼかす。ぼかさないときは、box-shadowプロパティには、
box-shadow: [inset] 水平のずれ 垂直のずれ ぼけ幅 [伸縮量] カラーメニューバーclass属性"menu")
.menu {

    box-shadow: 0 0 0 4px cyan;
}
改めて、box-shadowプロパティを定め直そう。メニューバーに、
.menu {

    box-shadow: 0 0 0 1px white;
}
メニュー項目にポインタが重なったとき他の項目のテキストをぼかす
いよいよ、text-shadowプロパティで影をつくったうえで、transparentキーワードで透明にするのだ。メニューバーclass属性"menu"):hover擬似クラスで、<a>要素につぎのような定めを加えた。これで、
.menu:hover a {
    color: transparent;
    text-shadow: 0 0 5px silver;
}
ポインタが重なったメニュー項目を浮き上がらせるアニメーション
つぎに、class属性"item"):hover擬似クラスで、<a>要素のテキストは暗くして際立たせる。また、
.item:hover {
    background: ghostwhite;
}
.item:hover a {
    color: black;

    text-shadow: 0 1px 1px white;
}
さらに、transformプロパティにtranslateY()関数で垂直移動し、scale()関数の引数に比率を渡す。引数は2つだとそれぞれ水平と垂直、
.item:hover a {

    transform: translateY(-2px) scale(1.02);

}
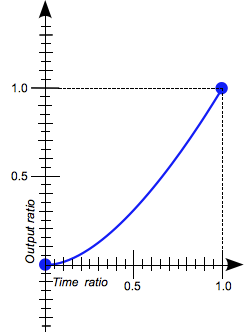
滑らかなアニメーションにするため、class属性"item")transitionプロパティを定める。タイミング関数は、ease-inを選んだtransitionプロパティは継承しないので、<a>要素にも同じ定めを加えた。
.item {

    transition: 0.2s ease-in;
}
.item a {

    transition: 0.2s ease-in;
}
※この図はMozilla Contributorsによるもので、CC-BY-SA 2.
マウスボタンを押したメニュー項目を凹ませる
仕上げは、class属性"item"):active擬似クラスに、inset)transitionプロパティの定めを取り消すことnone)
.item:active {
    border-left-color: whitesmoke;
    box-shadow: inset 0 0 22px lightgrey;
    transition: none;
}
.item:active a {
    color: dimgray;
    transform: translateY(-1px);
    transition: none;
}
これで選択項目以外がぼけるメニューのでき上がりだ。書き上げたCSSの定めは、
body {
    font-family: Arial, Helvetica, sans-serif;
    background: dimgray;
}
.container {
    height: 50px;
    margin: 40px 0;
    padding: 50px 0;
    text-align: center;
}
.menu {
    display: inline-block;
    list-style: none;
    margin: 0;
    overflow: hidden;
    padding: 0;
    position: relative;
    background: linear-gradient(ghostwhite, gainsboro);
    box-shadow: 0 0 0 1px white;
}
.item {
    float: left;
    border-left: 1px solid white;
    border-right: 1px solid gainsboro;
    font-size: 14px;
    line-height: 50px;
    padding: 0 35px;
    cursor: pointer;
    transition: 0.2s ease-in;
}
.item a {
    color: gray;
    display: block;
    text-decoration: none;
    text-shadow: 0 1px 0 white;
    transition: 0.2s ease-in;
}
li.item:first-child {
    border-left: none;
}
li.item:last-child {
    border-right: none;
}
.menu:hover a {
    color: transparent;
    text-shadow: 0 0 5px silver;
}
.item:hover {
    background: ghostwhite;
}
.item:hover a {
    color: black;
    transform: translateY(-2px) scale(1.02);
    text-shadow: 0 1px 1px white;
}
.item:active {
    border-left-color: whitesmoke;
    box-shadow: inset 0 0 22px lightgrey;
    transition: none;
}
.item:active a {
    color: dimgray;
    transform: translateY(-1px);
    transition: none;
}


