今回はお題として、
2つの項目の静的なデザイン
<body>要素には、<div>要素class属性"item")<a>要素class属性"link")<span>要素で加えている。アニメーションは、<a>要素にclass属性<span>要素には、data-グローバル属性を加えた。これらの値は、<div>要素class属性"container")
<div class="container">
    <div class="item">
        <a class="link animation-1" href="http://gihyo.jp/design/serial/01/createjs">
            <span data-letters-l="Crea" data-letters-r="teJS">CreateJS</span>
        </a>
    </div>
    <div class="item">
        <a class="link animation-3" href="http://gihyo.jp/design/serial/01/css-animation">
            <span>CSS</span>
            <span>3</span>
        </a>
    </div>
</div>
Google Fontsはつぎの3つを使った<script>要素で-prefix-freeを読み込んである
<link href="https://fonts.googleapis.com/css?family=Raleway:400,900" rel="stylesheet" type="text/css">
<link href="https://fonts.googleapis.com/css?family=Dosis:400,800" rel="stylesheet" type="text/css">
<link href="https://fonts.googleapis.com/css?family=Playfair+Display" rel="stylesheet" type="text/css">
<script src="lib/prefixfree.min.js"></script>前掲<body>要素の記述に対しては、<style>要素を与える。まだアニメーションもマウスインタラクションもない。ただし、
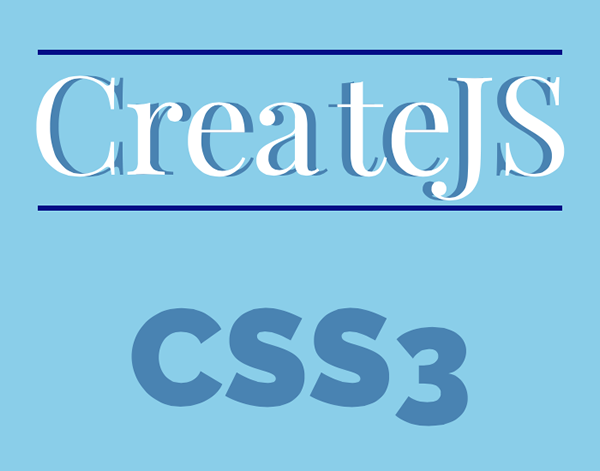
body {
    font-family: Arial, sans-serif;
    background-color: Skyblue;
}
.item {
    padding: 25px 0;
    z-index: 1;
    display: flex;
    align-items: center;
    justify-content: center;
}
.link {
    text-decoration: none;
    position: relative;
    font-size: 5em;
    line-height: 1;
}
.animation-1 {
    font-family: 'Playfair Display', serif;
    font-weight: 400;
    color: Steelblue;
    padding: 0 0 0.125em;
    margin-top: -0.05em;
}
.animation-1::before,
.animation-1::after {
    content: '';
    width: 100%;
    height: 3px;
    background: Darkblue;
    position: absolute;
}
.animation-1::before {
    right: 0;
    top: 0;
}
.animation-1::after {
    left: 0;
    bottom: -0.05em;
}
.animation-1 span::before,
.animation-1 span::after {
    position: absolute;
    color: white;
}
.animation-1 span::before {
    content: attr(data-letters-l);
    left: 0;
    transform: translateX(-5px);
}
.animation-1 span::after {
    content: attr(data-letters-r);
    right: 0;
    transform: translateX(5px);
}

.animation-3 {
    font-weight: 900;
    font-family: 'Raleway', Arial, sans-serif;
    line-height: 1em;
    margin-top: 0;
    color: Steelblue;
}
.animation-3 span {
    position: relative;
    display: inline-block;
}
はじめの項目を擬似要素で飾りつける
このお題は、::beforeおよび::afterでテキストの飾りつけやアニメーションを加えることがひとつの鍵となる。前掲コード1では、
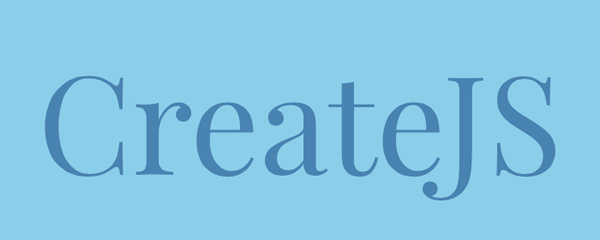
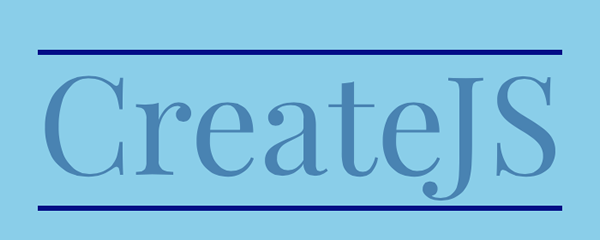
まず、<a>要素にアニメーションのため定めたclass属性::beforeと::afterで以下のように加えよう
<a class="link animation-1" href="http://gihyo.jp/design/serial/01/createjs">

</a>.animation-1::before,
.animation-1::after {
content: '';
width: 100%;
height: 3px;
background: Darkblue;
position: absolute;
}
.animation-1::before {
right: 0;
top: 0;
}
.animation-1::after {
left: 0;
bottom: -0.05em;
}
つぎに、<span>要素)::beforeと::after)contentプロパティに定める。その文字列の値は、data-グローバル属性に与えた。値を取り出すには、attr()式を用いればよい。そして、translateX()関数
<span data-letters-l="Crea" data-letters-r="teJS">CreateJS</span>.animation-1 span::before,
.animation-1 span::after {
position: absolute;
color: white;
}
.animation-1 span::before {
content: attr(data-letters-l);
left: 0;
transform: translateX(-5px);
}
.animation-1 span::after {
content: attr(data-letters-r);
right: 0;
transform: translateX(5px);
}
擬似要素をアニメーションさせる
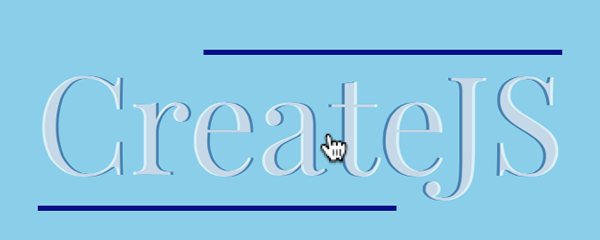
はじめの項目にマウスポインタを重ねたら、opacityプロパティで透明にしておく。そして、:hover擬似クラス)、translateX()関数でもとのテキストと合わせた。これで、transitionプロパティに時間を定めれば、
.animation-1 span::before,
.animation-1 span::after {

    opacity: 0;
    transition: 0.5s;
}

.animation-1:hover span::before,
.animation-1:hover span::after {
    opacity: 1;
    transform: translateX(0);
}
つぎに、scaleX()関数で幅を0に縮めておく。そして、:hover擬似クラスでもとの幅に戻す。ただ、transform-originプロパティにより、
.animation-1::before,
.animation-1::after {

    transform: scaleX(0);
    transition: 0.5s;
}
.animation-1::before {

    transform-origin: right;
}
.animation-1::after {

    transform-origin: left;
}
.animation-1:hover::before,
.animation-1:hover::after {
    transform: scaleX(1);
}
終わりの項目をアニメーションさせる
終わりの項目のテキストは、<span>要素に分けておいた。それぞれに異なったアニメーションを加えるためだ。
<a class="link animation-3" href="http://gihyo.jp/design/serial/01/css-animation">
    <span>CSS</span>
    <span>3</span>
</a>
テキストは、class属性"animation-3"):hover擬似クラスで違う色に変えよう。2つの<span>要素は、:first-of-typeと:last-of-typeで選び分けられる。transitionプロパティを定めれば、
.animation-3 span {

    transition: 0.5s;
}
.animation-3:hover span:first-of-type {
    color: white;
}
.animation-3:hover span:last-of-type {
    color: Midnightblue;
}
さらに、<span>要素に、::before擬似要素で矩形を加える。領域は、translateY()関数でテキストの領域の上下外側に大きくずらしてある
.animation-3 span::before {
    content: '';
    position: absolute;
    width: 100%;
    height: 100%;
    background: white;
}
.animation-3 span:last-of-type::before {
    background: Midnightblue;
}
.animation-3 span:first-of-type::before {
    transform: translateY(-150%);
}
.animation-3 span:last-of-type::before {
    transform: translateY(150%);
}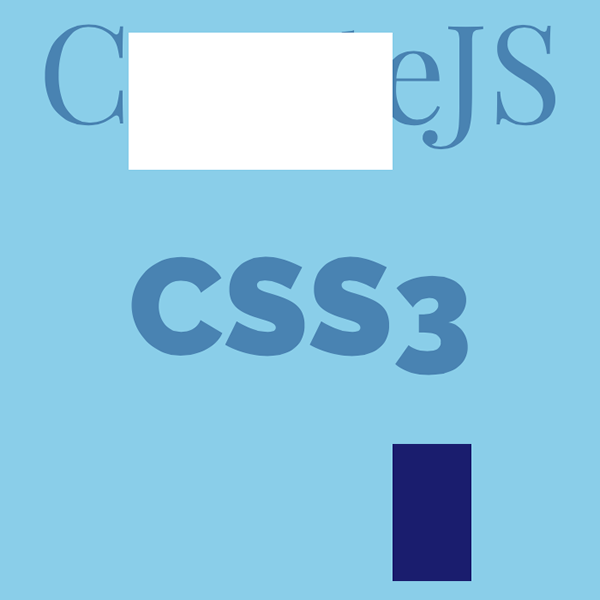
2つの矩形は、overflowプロパティプロパティの値をhiddenに定めれば、
.animation-3 {

    overflow: hidden;

}

.animation-3 span::before {

    transition: 0.5s;
}

.animation-3:hover span:last-of-type::before,
.animation-3 span:first-of-type::before {
    transform: translateY(-150%);
}
.animation-3:hover span:first-of-type::before,
.animation-3 span:last-of-type::before {
    transform: translateY(150%);
}
これで、
body {
    font-family: Arial, sans-serif;
    background-color: Skyblue;
}
.item {
    padding: 25px 0;
    z-index: 1;
    position: relative;
    display: flex;
    align-items: center;
    justify-content: center;
}
.link {
    text-decoration: none;
    position: relative;
    font-size: 5em;
    line-height: 1;
}
.animation-1 {
    font-family: 'Playfair Display', serif;
    font-weight: 400;
    color: Steelblue;
    padding: 0 0 0.125em;
    margin-top: -0.05em;
}
.animation-1::before,
.animation-1::after {
    content: '';
    width: 100%;
    height: 3px;
    background: Darkblue;
    position: absolute;
    transform: scaleX(0);
    transition: 0.5s;
}
.animation-1::before {
    right: 0;
    top: 0;
    transform-origin: right;
}
.animation-1::after {
    left: 0;
    bottom: -0.05em;
    transform-origin: left;
}
.animation-1:hover::before,
.animation-1:hover::after {
    transform: scaleX(1);
}
.animation-1 span::before,
.animation-1 span::after {
    position: absolute;
    color: white;
    opacity: 0;
    transition: 0.5s;
}
.animation-1 span::before {
    content: attr(data-letters-l);
    left: 0;
    transform: translateX(-5px);
}
.animation-1 span::after {
    content: attr(data-letters-r);
    right: 0;
    transform: translateX(5px);
}
.animation-1:hover span::before,
.animation-1:hover span::after {
    opacity: 1;
    transform: translateX(0);
}

.animation-3 {
    font-weight: 900;
    font-family: 'Raleway', Arial, sans-serif;
    line-height: 1em;
    margin-top: 0;
    overflow: hidden;
    color: Steelblue;
}
.animation-3 span {
    position: relative;
    display: inline-block;
    transition: 0.5s;
}
.animation-3:hover span:first-of-type {
    color: white;
}
.animation-3:hover span:last-of-type {
    color: Midnightblue;
}
.animation-3 span::before {
    content: '';
    position: absolute;
    width: 100%;
    height: 100%;
    background: white;
    transition: 0.5s;
}
.animation-3 span:last-of-type::before {
    background: Midnightblue;
}
.animation-3:hover span:last-of-type::before,
.animation-3 span:first-of-type::before {
    transform: translateY(-150%);
}
.animation-3:hover span:first-of-type::before,
.animation-3 span:last-of-type::before {
    transform: translateY(150%);
}


