はじめに
前回紹介したJupyterではブラウザ上でPythonを実行したり、
もちろん初めからPandasの多種多様な統計処理を扱う必要はありません。最初はPandasの持つデータの入出力を簡単に行ったり、
Pandasの基本的な使い方
サンプルデータで試す
下記のサンプルを元に試してみます。
host,method,status
153.232.253.97,GET,200
153.232.253.97,GET,401
253.23.23.1,GET,200
これをsample.
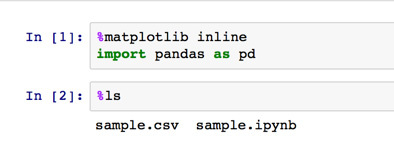
# グラフをブラウザ内で表示するために呼び出します
%matplotlib inline
# Pandasの読み込み
import pandas as pd
# Jupyterでのlsコマンド
%ls
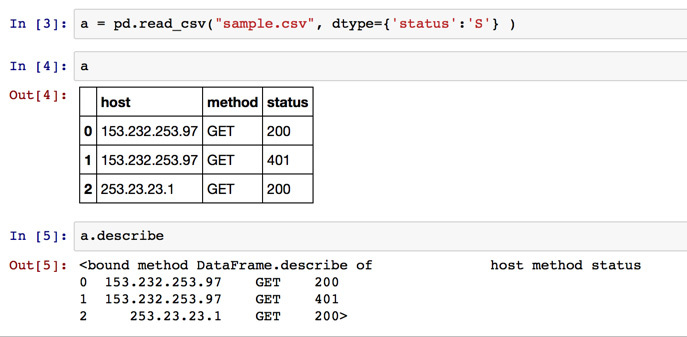
# CSVデータを変数aに取り込む(statusは文字列にしておきたいので、読み込む時にstringを指定する)
a = pd.read_csv("sample.csv", dtype={'status':'S'} )
# 読み込んだ変数aの内容をそのまま参照
a
# 各columnのデータ数、平均、分散などの統計量をざっと見ることができます
a.describe
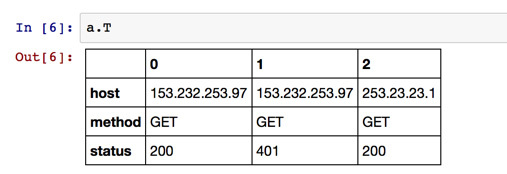
# ピボットテーブルを作る
a.T
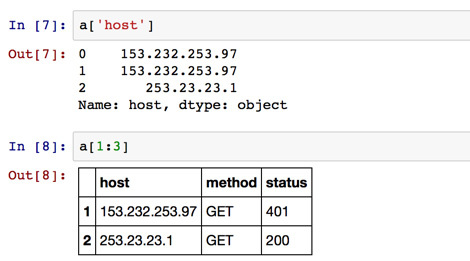
# 'host'カラムのデータのみ取得する
a['host']
# 1行目から2行目までを取得する
a[1:3]
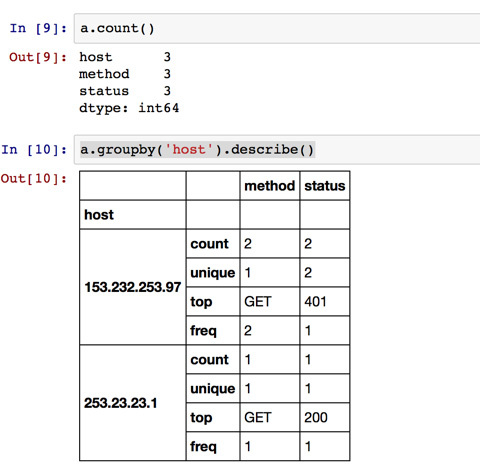
# それぞれのカラムごとの件数をカウントする
a.count()
# host毎の統計情報を参照する
a.groupby('host').describe()
# status が '200'のデータのみ取得する
a[a['status']=='200']
# status毎の件数を集計して、棒グラフで描画
a['status'].value_counts().plot(kind='bar')
さて、
MySQLからのデータの入力
それではまずはMySQLからデータを取得してみましょう。
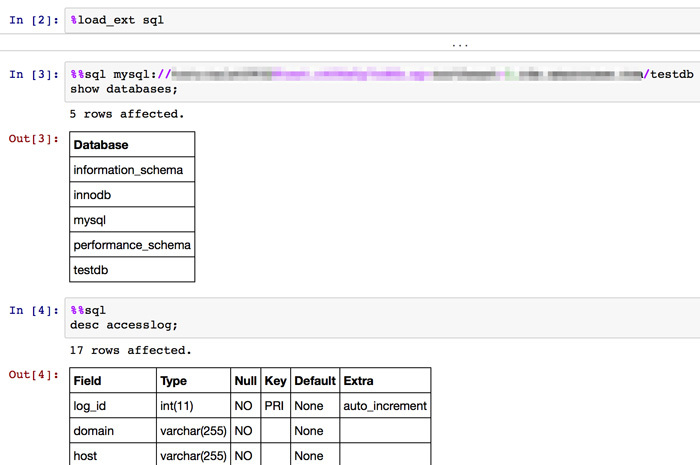
SQLと連携させるインターフェースを、%load_を実行します。これにより%%sqlと先頭につけることで、
%load_ext sql
備考:上記コマンドを実行した場合に、
/usr/local/pyenv/versions/3.4.3/lib/python3.4/site-packages/IPython/config.py:13: ShimWarning: The `IPython.config` package has been deprecated. You should import from traitlets.config instead.
  "You should import from traitlets.config instead.", ShimWarning)
/usr/local/pyenv/versions/3.4.3/lib/python3.4/site-packages/IPython/utils/traitlets.py:5: UserWarning: IPython.utils.traitlets has moved to a top-level traitlets package.
  warn("IPython.utils.traitlets has moved to a top-level traitlets package.")
MySQLへの接続情報を付与して、
%%sql mysql://username:password@hostname/database
show tables;
また、
%%sql
desc tables
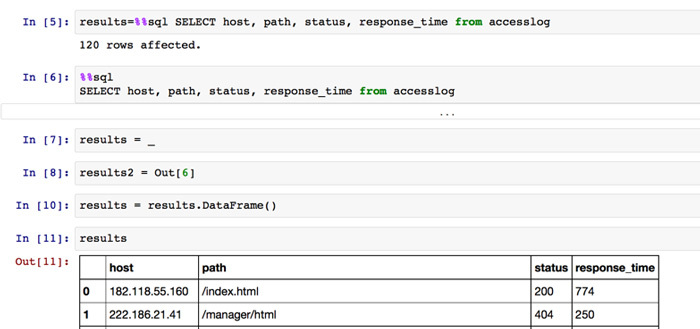
SQLの結果を取得するには、
下記のようにワンライナーで実行するか
results=%%sql SELECT host, path, status, response_time FROM accesslog
クエリを実行した後に_を利用することで直前に実行されたコマンドの結果を代入したり、
%%sql
SELECT host, path, status, response_time FROM accesslog
results = _
results = Out[14]
上記の場合は、
results = results.DataFrame()
ちなみにDataFrameとは、
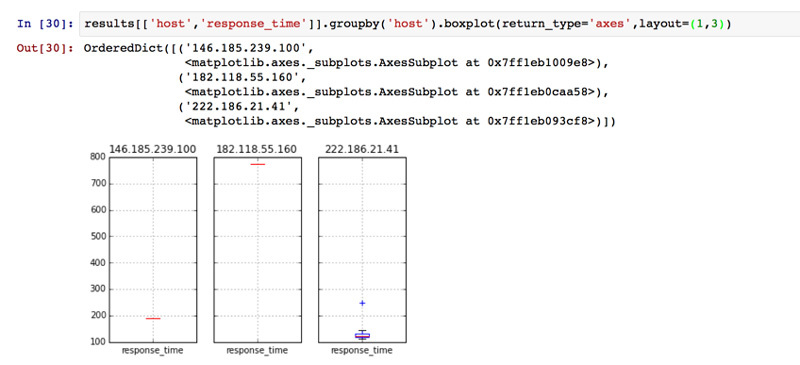
最後にこのMySQLのデータで、.boxplot()を利用します。
results[['host','response_time']].groupby('host').boxplot(return_type='axes',layout=(1,3))
まとめ
アドホック分析環境として、
次回は、


