


今まで紹介してきたサンプルはすべて、
そこで、
クラスの定義
とりあえず、
class Name {
    var firstName: String;
    var lastName: String;

    function fullname(): String {
        return "{firstName} {lastName}";
    }
}
クラスの定義はclassで行います。波括弧の中では、
実をいうとこの変更に伴って、
関数も波括弧の中で定義します。インタープリタ版では関数の実体は波括弧の外で行っていましたが、
上のNameクラスの場合、
では、
var name = Name {
    firstName: "Yuichi"
    lastName: "Sakuraba"
}

println("Full Name: {name.fullname()}");
実行結果を以下に示します。
Full Name: Yuichi Sakuraba
アトリビュートにデフォルト値を持たせるには、
| 型 | デフォルト値 |
|---|---|
| String | "" (null) |
| Integer | 0 |
| Number | 0. |
| Duration | 0ms |
| Boolean | false |
| オブジェクト | null |
| 関数 | null |
| シーケンス | [ ] (null) |
Stringとシーケンスにnullと記載しているのは、
class Photograph {
    var title: String;
    var width: Integer;
    var height: Integer;
    var resizable: Boolean;
    var image: Image;

    // デフォルト値の代入
    var kind: String = "JPEG";
}

var photo = Photograph {};

println("Title: {photo.title}");
println("Width: {photo.width}");
println("Resizable: {photo.resizable}");
println("Image: {photo.image}");
println("Kind: {photo.kind}");
kindアトリビュートだけデフォルト値を設定しました。titleアトリビュートやwidthアトリビュートはデフォルト値はなく、
Title:
Width: 0
Resizable: false
Image: null
Kind: JPEG
この結果からもStringが空文字、
次に関数型のアトリビュートを定義してみましょう。関数型のアトリビュートを定義するには、
class Printer {
    // 引数、戻り値なし
    var reset: function(): Void;

    // 引数、戻り値あり
    var print: function(String): Boolean;
    // こちらでも OK
//  var print: function(:String): Boolean;
}

var printer = Printer {
    reset: function(): Void {
        println("reset");
    }

    print: function(text: String): Boolean {
        println("Print: {text}");
        return true;
    }
}

printer.print("Hello, World!");
resetアトリビュートは引数がなく、
Print: Hello, World!
varだけでなく、
class MathConst {
    def pi: Number = 3.1415;
}
継承
次に継承させたクラスを作ってみましょう。サブクラスを作るにはJavaと同じくextendsを使用します。
class Foo {
    function foo() {
        println("Foo.foo");
    }
}

class Bar extends Foo {
    function bar() {
        println("Bar.bar");
    }
}

var bar = Bar {}
bar.foo();
bar.bar();
BarクラスがFooクラスのサブクラスになります。実行すると、
Foo.foo
Bar.bar
スーパークラスの関数をオーバライドする場合、
class Foo {
    function foo() {
        println("Foo.foo");
    }
}

class Bar  extends Foo{
    override function foo() {
        super.foo();
        println("Bar.foo");
    }
}

var bar = Bar {}
bar.foo();
BarクラスがFooクラスのfoo関数をオーバーライドし、
Foo.foo
Bar.foo
また、
class Foo {
    var foo = "FOO";
}

class Bar extends Foo {
    override var foo = "BAR";
}

var bar = Bar {};
println(bar.foo);
fooアトリビュートのデフォルト値を"FOO"から"BAR"に変更しています。実行すると以下のようになります。
BAR
JavaFX Scriptにはインターフェースは存在しませんが、
サブクラスでスーパークラスのアブストラクトメソッドを定義する場合も、
abstract class Foo {
    abstract function foo(): Void;
}

class Bar  extends Foo {
    override function foo(): Void {
        println("Bar.foo");
    }
}

var bar = Bar {}
bar.foo();
また、
class Yoo {}
class Hoo {}

class YooHoo extends Yoo, Hoo {}
JavaFX ScriptではJavaのクラスのサブクラスを作成することも可能なのですが、
たとえば、

また、
public interface Hello {
    public void sayHello(String name);
}
このHelloインターフェースを実装する場合でも、
class FXHello extends Hello {
    override function sayHello(name: String): Void {
        println("Hello, {name}!");
    }
}
インターフェースのメソッドをオーバライドする場合でも、
初期化ブロック
JavaFX Scriptにはコンストラクタはないことは、
このような場合、
- initブロック
- postinitブロック
initブロックはオブジェクト生成の最終段階で処理されるブロックです。initブロックの処理後にオブジェクトの生成が完了します。一方のpostinitブロックはオブジェクト生成が終了した後に処理されるブロックです。この2種類のブロックはどのように使い分ければいいのでしょう。その答えは、
class Foo {
    init {
        println("Foo.init");
    }

    postinit {
        println("Foo.postinit");
    }
}

class Bar extends Foo{
    init {
        println("Bar.init");
    }

    postinit {
        println("Bar.postinit");
    }
}

Bar{}
FooクラスとBarクラスにinitブロックとpostinitブロックを定義しました。これを実行するとどうなるでしょう。BarクラスがFooクラスのサブクラスということを考えなくてはいけません。
Foo.init
Bar.init
Foo.postinit
Bar.postinit
この結果から、
この順番を理解していれば、
アクセス修飾子
今までの説明ではわざと省略していたのですが、
| アクセス修飾子 | 説明 |
|---|---|
| デフォルト | クラス/ |
| package | クラス/ |
| protected | クラス/ |
| public | どこからでもアクセス可能 |
privateがないことに気がつかれた方も多いのではないでしょうか。JavaFX Scriptではprivateに相当するのが、
デフォルトのアクセス修飾を変更したため、
表2のアクセス修飾子はクラスの定義にも、
| アクセス修飾子 | 説明 |
|---|---|
| public-read | 読み込みはどこからでも行えるが、 |
| public-init | 初期化だけ可能で、 |
public-readは、
class Foo {
    public var x: Integer;
    public-read var squareX = bind x * x;
}

var foo = Foo{
    x: 10
}
println("Foo.x {foo.squareX}");
foo.x = 20;
println("Foo.x {foo.squareX}");
squareXアトリビュートはxアトリビュートにバインドしているため、
Foo.x 100
Foo.x 400
public-initは、
public-readとpublic-initは他のアクセス修飾子と合せて使用することも可能です。たとえば、
class Foo {
    public var x: Integer;
    // パッケージ内のみ読み込み可能
    public-read package var squareX = bind x * x;
}
このように記述することでパッケージ内だけ読み込みができることになります。
カスタムコンポーネントを作成する
最後にクラスの定義に関するサンプルを紹介しましょう。
今まで紹介してきたサンプルは、
題材として非矩形のボタンを取りあげます。筆者はよくプレゼンテーションなどで
今回作成したサンプルコードは以下よりダウンロードできます。
- サンプルコード
(smilingbutton. zip

カスタムコンポーネントはjavafx.
では、
まずプロジェクトを作成します。プロジェクト名はSmilingButtonにしました。プロジェクトを作成したら、
今まで、
ここではSmilingButtonクラスを作成するので、
空のファイルにまずカスタムコンポーネントのひな形を作ってしまいましょう。これもコードパレットから作成することができます。CustomNodeはStageなどと同じApplicationsカテゴリにあります。CustomNodeをエディタ領域にドラッグ&ドロップすると以下のようなコードが生成されます。
すでにcreate関数が定義されています。CustomNodeクラスのcreate関数をオーバーライドするのでoverrideキーワードが関数定義に付加されています。
package net.javainthebox.javafx;

import javafx.scene.CustomNode;
import javafx.scene.Group;
import javafx.scene.Node;

class MyCustomNode extends CustomNode {

    public override function create(): Node {
        return Group {
            content: []
        };
    }
}
赤字で示したjavafx.
まず、
class SmilingButton extends CustomNode {
    public var centerX: Number;
    public var centerY: Number;
    public var size: Number;

    public override function create(): Node {
        return Group {
            content: [
                Circle {
                    centerX: centerX
                    centerY: centerY
                    radius: size
                    fill: Color.rgb(255, 204, 153)
                    stroke: Color.BLACK
                }
            ]
        };
    }
}
この段階で一度実行してみましょう。しかし、
しかし、
class SmilingButton extends CustomNode {
    public var centerX: Number;
    public var centerY: Number;
    public var size: Number;

    public override function create(): Node {
        return Group {
            content: [
                Circle {
                    centerX: centerX
                    centerY: centerY
                    radius: size
                    fill: Color.rgb(255, 204, 153)
                    stroke: Color.BLACK
                }
            ]
        };
    }
}

// プレビューのための関数
function run() {
    Stage {
        scene: Scene {
            width: 150
            height: 150
            content: [
                SmilingButton {
                    centerX: 75
                    centerY: 75
                    size: 50
                }
            ]
        }
    }
}
赤字で示したように、

次に耳を描きます。耳は楕円で表します。顔を表す円より先に描画することで、
そして、
class SmilingButton extends CustomNode {
    public var centerX: Number;
    public var centerY: Number;
    public var size: Number;

    public override function create(): Node {
        return Group {
            content: [
                Ellipse {
                    centerX: centerX - size,
                    centerY: centerY
                    radiusX: size * 0.2
                    radiusY: size * 0.3
                    fill: Color.rgb(255, 204, 153)
                    stroke: Color.BLACK
                },
                Ellipse {
                    centerX: centerX + size,
                    centerY: centerY
                    radiusX: size * 0.2
                    radiusY: size * 0.3
                    fill: Color.rgb(255, 204, 153)
                    stroke: Color.BLACK
                },
                Circle {
                    centerX: centerX
                    centerY: centerY
                    radius: size
                    fill: Color.rgb(255, 204, 153)
                    stroke: Color.BLACK
                }
            ]
        };
    }
}この段階でプレビューしたのが図12です。ずいぶん顔らしくなってきました。

次に口を作ります。口は楕円と円を組み合わせて作りました。口の上の部分が円弧、

ShapeSubtractクラスは基のシェイプをaアトリビュート、
// 笑っている口は楕円から円を差し引いた形
var mouth = ShapeSubtract  {
    // 楕円
    a: Ellipse {
        centerX: centerX
        centerY: centerY + size * 0.55
        radiusX: size * 0.15
        radiusY: size * 0.3
    }
    // 円
    b: Circle {
        centerX: centerX,
        centerY: centerY + size * 0.05
        radius: size * 0.5

    }
    fill: Color.RED
    stroke: Color.BLACK
};作成した変数mouthを輪郭を表すGroupオブジェクトのcontentアトリビュートの最後に加えます。この状態で実行したのが図14です。

最後に目を付け加えましょう。目は円弧なのでjavafx.
class SmilingButton extends CustomNode {
    public var centerX: Number;
    public var centerY: Number;
    public var size: Number;

    public override function create(): Node {
        // 笑っている口は楕円から円を差し引いた形
        var mouth = ShapeSubtract  {
                // 楕円
                a: Ellipse {
                centerX: centerX
                centerY: centerY + size * 0.55
                radiusX: size * 0.15
                radiusY: size * 0.3
            }
                // 円
                b: Circle {
                centerX: centerX,
                centerY: centerY + size * 0.05
                radius: size * 0.5

            }
            fill: Color.RED
            stroke: Color.BLACK
        };

        // 笑っている目は2つの円弧
        var eyes = Group {
            content: [
                    Arc {
                    centerX: centerX - size * 0.4
                    centerY: centerY + size * 0.1
                    radiusX: size * 0.2
                    radiusY: size * 0.2
                    startAngle: 0,
                    length: 180
                    type: ArcType.OPEN
                    fill: null
                    stroke: Color.BLACK
                },
                Arc {
                    centerX: centerX + size * 0.4
                    centerY: centerY + size * 0.1
                    radiusX: size * 0.2
                    radiusY: size * 0.2
                    startAngle: 0,
                    length: 180
                    type: ArcType.OPEN
                    fill: null
                    stroke: Color.BLACK
                }
            ]
        };

        return Group {
            content: [
                Ellipse {
                    centerX: centerX - size,
                    centerY: centerY
                    radiusX: size * 0.2
                    radiusY: size * 0.3
                    fill: Color.rgb(255, 204, 153)
                    stroke: Color.BLACK
                },
                Ellipse {
                    centerX: centerX + size,
                    centerY: centerY
                    radiusX: size * 0.2
                    radiusY: size * 0.3
                    fill: Color.rgb(255, 204, 153)
                    stroke: Color.BLACK
                },
                Circle {
                    centerX: centerX
                    centerY: centerY
                    radius: size
                    fill: Color.rgb(255, 204, 153)
                    stroke: Color.BLACK
                },
                mouth, eyes
            ]
        };
    }
}
同じように驚いた顔も作成します

そして、
ここでは、
class SmilingButton extends CustomNode {
    public-init var centerX: Number;
    public-init var centerY: Number;
    public-init var size: Number;

    // 笑っている目と口
    var smilingEyes: Node;
    var smilingMouth: Node;

    // 驚いている目と口
    var surprisedEyes: Node;
    var surprisedMouth: Node;

    var eyes: Node;
    var mouth: Node;

    init {
        // 笑っている目は2つの円弧
        smilingEyes = Group {
            content: [ Arc { ... }, Arc { ... } ]
        };

        // 驚いている目は楕円を重ねる
        surprisedEyes = Group {
            content: [ Ellipse { ... }, Ellipse { ... }, Ellipse { ... }, Ellipse { ... }]
        };

        // 笑っている口は楕円から円を差し引いた形
        smilingMouth = ShapeSubtract  { ... }

        // 驚いている口は楕円
        surprisedMouth = Ellipse { ... }

        // デフォルト値をセット
        eyes = smilingEyes;
        mouth  = smilingMouth;
    }

    public override function create(): Node {
        // 輪郭は円と楕円を組み合わせた形
        var profile =  Group {
            content: [ Ellipse { ... }, Ellipse { ... }, Circle { ... }]
        };

        // mouth と eyes は変化するのでバインドする
        return Group {
            content: bind [
                profile,
                mouth,
                eyes
            ]
        };
    }
}
smilingEyesが笑っている目、
次に、
前回、
onMousePressedアトリビュートはSmilingButtonクラスを使用する側で書き換えることが可能です。つまり、
Swingのように複数のイベントリスナが登録できればいいのですが、
では、
そこで思い出していただきたいのが、
class SmilingButton extends CustomNode {
    public-init var centerX: Number;
    public-init var centerY: Number;
    public-init var size: Number;

    // 笑っている目と口
    var smilingEyes: Node;
    var smilingMouth: Node;

    // 驚いている目と口
    var surprisedEyes: Node;
    var surprisedMouth: Node;

    var eyes: Node;
    var mouth: Node;

    // クリックに応じて表情を変化させる
    override var pressed on replace {
        if (pressed) {
            // クリックされた時は驚いた顔
            eyes = surprisedEyes;
            mouth = surprisedMouth;
        } else {
            // 通常は笑った顔
            eyes = smilingEyes;
            mouth = smilingMouth;
        }
    };

    init {
        // 笑っている目は2つの円弧
        smilingEyes = Group { ... };

        // 驚いている目は楕円を重ねる
        surprisedEyes = Group { ... };

        // 笑っている口は楕円から円を差し引いた形
        smilingMouth = ShapeSubtract  { ... }

        // 驚いている口は楕円
        surprisedMouth = Ellipse { ... }

        // デフォルト値をセット
        eyes = smilingEyes;
        mouth  = smilingMouth;
    }

    public override function create(): Node {
        // 輪郭は円と楕円を組み合わせた形
        var profile =  Group { ... };

        // mouth と eyes は変化するのでバインドする
        return Group {
            content: bind [
                profile,
                mouth,
                eyes
            ]
        };
    }
}
pressedアトリビュートに置換トリガを付加する場合でも、
eyesアトリビュートとmouthアトリビュートが変更された時に描画に反映されるように、
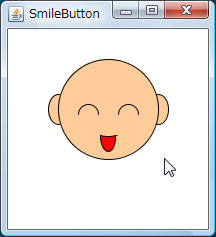
これで、
では、
var label = "";
Stage {
title: "Smiling Button"
scene: Scene {
width: 200
height: 200
content: [
SmilingButton {
centerX: 100
centerY: 80
size: 50
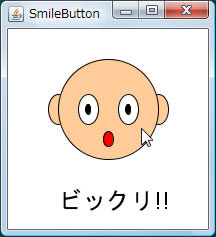
onMousePressed: function(event: MouseEvent) {
label = "ビックリ!!"
}
onMouseReleased: function(event: MouseEvent) {
label = ""
}
},
Text {
font: Font {
size: 24
}
x: 50
y: 180
content: bind label
}
]
}
}このmian.
ところが、
C:\NetBeansProjects\SmilingButton\src\main.fx:7:
net.javainthebox.javafx.SmilingButton は net.javainthebox.javafx で
script only (default) アクセスされます。
import net.javainthebox.javafx.SmilingButton;
先ほどアクセス修飾子の説明をしたばかりなのに、
public class SmilingButton extends CustomNode {
        ......
さあ、
なお、
さて、
次回はアニメーションを解説する予定です。お楽しみに。
package net.javainthebox.javafx;

import javafx.scene.CustomNode;
import javafx.scene.Group;
import javafx.scene.Node;
import javafx.scene.Scene;
import javafx.scene.input.MouseEvent;
import javafx.scene.paint.Color;
import javafx.scene.shape.Arc;
import javafx.scene.shape.ArcType;
import javafx.scene.shape.Circle;
import javafx.scene.shape.Ellipse;
import javafx.scene.shape.ShapeSubtract;
import javafx.stage.Stage;

public class SmilingButton extends CustomNode {
    public-init var centerX: Number;
    public-init var centerY: Number;
    public-init var size: Number;

    // 笑っている目と口
    var smilingEyes: Node;
    var smilingMouth: Node;

    // 驚いている目と口
    var surprisedEyes: Node;
    var surprisedMouth: Node;

    var eyes: Node;
    var mouth: Node;

    // クリックに応じて表情を変化させる
    override var pressed on replace {
        if (pressed) {
            // クリックされた時は驚いた顔
            eyes = surprisedEyes;
            mouth = surprisedMouth;
        } else {
            // 通常は笑った顔
            eyes = smilingEyes;
            mouth = smilingMouth;
        }
    };

    init {
        // 笑っている目は2つの円弧
        smilingEyes = Group {
            content: [
                Arc {
                    centerX: centerX - size * 0.4
                    centerY: centerY + size * 0.1
                    radiusX: size * 0.2
                    radiusY: size * 0.2
                    startAngle: 0,
                    length: 180
                    type: ArcType.OPEN
                    fill: null
                    stroke: Color.BLACK
                },
                Arc {
                    centerX: centerX + size * 0.4
                    centerY: centerY + size * 0.1
                    radiusX: size * 0.2
                    radiusY: size * 0.2
                    startAngle: 0,
                    length: 180
                    type: ArcType.OPEN
                    fill: null
                    stroke: Color.BLACK
                }
            ]
        };

        // 驚いている目は楕円を重ねる
        surprisedEyes = Group {
            content: [
                Ellipse {
                    centerX: centerX - size * 0.4,
                    centerY: centerY
                    radiusX: size * 0.2
                    radiusY: size * 0.3
                    fill: Color.WHITE
                    stroke: Color.BLACK
                },
                Ellipse {
                    centerX: centerX + size * 0.4,
                    centerY: centerY
                    radiusX: size * 0.2
                    radiusY: size * 0.3
                    fill: Color.WHITE
                    stroke: Color.BLACK
                },
                Ellipse {
                    centerX: centerX - size * 0.4,
                    centerY: centerY
                    radiusX: size * 0.05
                    radiusY: size * 0.1
                    fill: Color.BLACK
                    stroke: Color.BLACK
                }
                Ellipse {
                    centerX: centerX + size * 0.4,
                    centerY: centerY
                    radiusX: size * 0.05
                    radiusY: size * 0.1
                    fill: Color.BLACK
                    stroke: Color.BLACK
                }
            ]
        };

        // 笑っている口は楕円から円を差し引いた形
        smilingMouth = ShapeSubtract  {
            // 楕円
            a: Ellipse {
                centerX: centerX
                centerY: centerY + size * 0.55
                radiusX: size * 0.15
                radiusY: size * 0.3
            }
            // 円
            b: Circle {
                centerX: centerX,
                centerY: centerY + size * 0.05
                radius: size * 0.5

            }
            fill: Color.RED
            stroke: Color.BLACK
        };

        // 驚いている口は楕円
        surprisedMouth = Ellipse {
            centerX: centerX,
            centerY: centerY + size * 0.6
            radiusX: size * 0.1
            radiusY: size * 0.15
            fill: Color.RED
            stroke: Color.BLACK
        }

        // デフォルト値をセット
        eyes = smilingEyes;
        mouth  = smilingMouth;
   }

    public override function create(): Node {
        // 輪郭は円と楕円を組み合わせた形
        var profile =  Group {
            content: [
                Ellipse {
                    centerX: centerX - size,
                    centerY: centerY
                    radiusX: size * 0.2
                    radiusY: size * 0.3
                    fill: Color.rgb(255, 204, 153)
                    stroke: Color.BLACK
                },
                Ellipse {
                    centerX: centerX + size,
                    centerY: centerY
                    radiusX: size * 0.2
                    radiusY: size * 0.3
                    fill: Color.rgb(255, 204, 153)
                    stroke: Color.BLACK
                },
                Circle {
                    centerX: centerX,
                    centerY: centerY
                    radius: size
                    fill: Color.rgb(255, 204, 153)
                    stroke: Color.BLACK
                }
            ]
        };

        // mouth と eyes は変化するのでバインドする
        return Group {
            content: bind [
                profile,
                mouth,
                eyes
            ]
        };
    }
}

function run() {
    Stage {
        scene: Scene {
            width: 150
            height: 150
            content: [
                SmilingButton {
                    centerX: 75
                    centerY: 75
                    size: 50
                }
            ]
        }
    }
}