


はじめに
本連載では、
前回は、
今回は、
フォームを作成
最初にフォームを作成しましょう。
C#を起動したら、
その後、
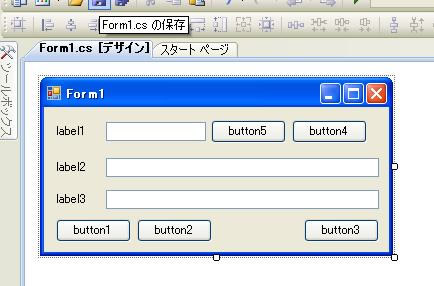
このフォームのサイズを調整して、

以前作成した上記のVB6サンプルソフトのフォームを参考に、
次に画面右下の
なお、
同様に、
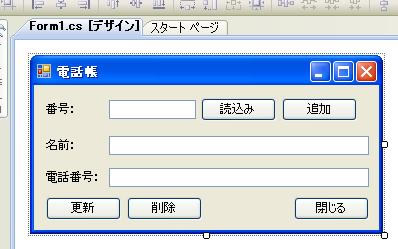
- ラベル
(Label) - 番号:
(label1) - 名前:
(label2) - 電話番号:
(label3)
- コマンドボタン
(Button) - 読込み
(readButton) - 追加
(addButton) - 更新
(updateButton) - 削除
(deleteButton) - 閉じる
(closeButton)
- テキストボックス
(TextBox) - 番号
(codeTextBox) - 名前
(nameTextBox) - 電話番号
(telephoneNumberTextBox)
名前を変更するたびにリファクタという処理が走ります。リファクタは、
画面上部に同名のメニューがあるのでクリックしてみてください。
コントロールの名前を変更することによって、
しかし、
その理由は自動生成されたコードにあります。
自動生成されたコードに関する説明は後述しますので、
イベント処理を作成
次にイベントが発生した時に呼び出されるメソッドを追加していきましょう。
まず
再度プロパティ画面に切り替える時は、
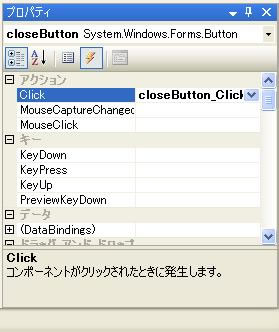
表示されたButtonコントロールのイベント名の一覧からClickをダブルクリックすることで、
- closeButton_
ClickメソッドがForm1. csファイルに追加されます。 - closeButton_
Clickメソッドを呼び出すためのイベントハンドラがcloseButton. Clickイベントに追加されます。 - Form1.
csコードエディタが起動します。
イベントハンドラを追加する方法は、
しかし、
VB6では、
しかし、
では、
この答も自動生成されたコードにあります。
自動生成されたコードに関する説明は後述しますので、
さて、
再度
- addButton.
Click - readButton.
Click - updateButton.
Click - deleteButton.
Click - Form1.
Load - Form1.
FormClosed
なお、
自動生成されたコード
今までの説明で、
ひとつ目は、
これらの答えは、
複雑そうに見えるかも知れませんが、
まずは、
ここには、
この先頭部分にある
C#では、
しかし、
そこで、
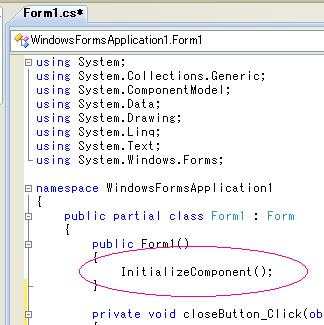
Form1.
このファイルを眺めてみてください。何となく今までフォームエディタやプロパティ、
実は、
したがって、
ただし、
VB6では、
以下にInitializeComponent()メソッド本体のコードを抜粋してみましょう。
/// <summary>
/// デザイナ サポートに必要なメソッドです。このメソッドの内容を
/// コード エディタで変更しないでください。
/// </summary>
private void InitializeComponent()
{
    this.updateButton = new System.Windows.Forms.Button();
    this.label1 = new System.Windows.Forms.Label();
    this.codeTextBox = new System.Windows.Forms.TextBox();
    this.nameTextBox = new System.Windows.Forms.TextBox();
    this.label2 = new System.Windows.Forms.Label();
    this.telephoneNumberTextBox = new System.Windows.Forms.TextBox();
    this.label3 = new System.Windows.Forms.Label();
    this.deleteButton = new System.Windows.Forms.Button();
    this.closeButton = new System.Windows.Forms.Button();
    this.addButton = new System.Windows.Forms.Button();
    this.readButton = new System.Windows.Forms.Button();
    this.SuspendLayout();
    //
    // updateButton
    //
    this.updateButton.Location = new System.Drawing.Point(12, 112);
    this.updateButton.Name = "updateButton";
    this.updateButton.Size = new System.Drawing.Size(75, 23);
    this.updateButton.TabIndex = 0;
    this.updateButton.Text = "更新";
    this.updateButton.UseVisualStyleBackColor = true;
    this.updateButton.Click += new System.EventHandler(this.updateButton_Click);
最初に、
次に、
Set updateButton = New CommandButtonupdateButton変数にオブジェクトを生成しているということは、
Dim updateButton As CommandButtonこれは、
private System.Windows.Forms.Button updateButton;
private System.Windows.Forms.Label label1;
private System.Windows.Forms.TextBox codeTextBox;
private System.Windows.Forms.TextBox nameTextBox;
private System.Windows.Forms.Label label2;
private System.Windows.Forms.TextBox telephoneNumberTextBox;
private System.Windows.Forms.Label label3;
private System.Windows.Forms.Button deleteButton;
private System.Windows.Forms.Button closeButton;
private System.Windows.Forms.Button addButton;
private System.Windows.Forms.Button readButton;
privateはVB6でもありましたね。
その後のSystem.
そして、
両者を見比べると、
さて、
この//から始まる行は単純なコメントです。//から行の終端までに記述された部分がコメントとして扱われます。
その後に、
さて、
Nameプロパティの値をupdateButtonと変更したことによって、
最後にClickイベントに対して、
VB6のコードエディタは、
しかし、
私自身VB6からC#に移行した直後は、
しかし、
例えば、
次回の予定
今回は、
また、
次回からは、