


前回まで、
SSHサーバのインストール
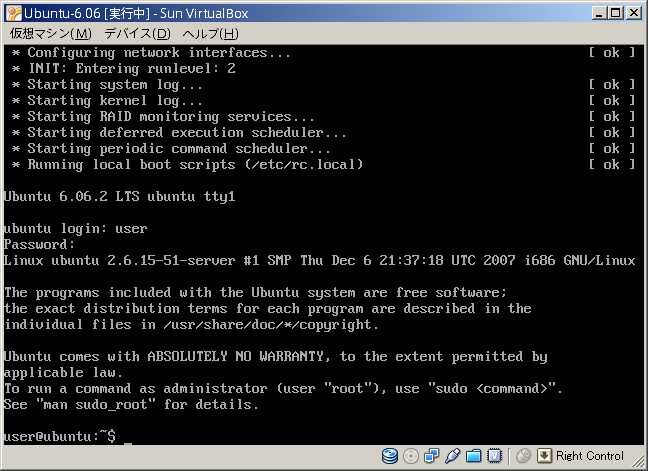
OSを再起動し
このような画面が表示されたらログインは完了です。
次に以下のコマンドを入力し、
yes|sudo aptitude install openssh-server && sudo shutdown -h now
パスワードの入力が求められますので、
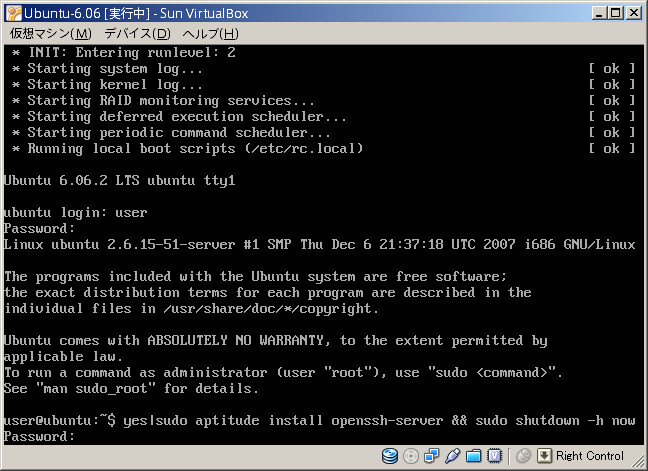
SSHサーバのインストールが開始され、
次に、
ポートフォワーディングの設定
ポートフォワーディングを設定することで、
仮想マシンがシャットダウンしたら、
Windows キー+r、
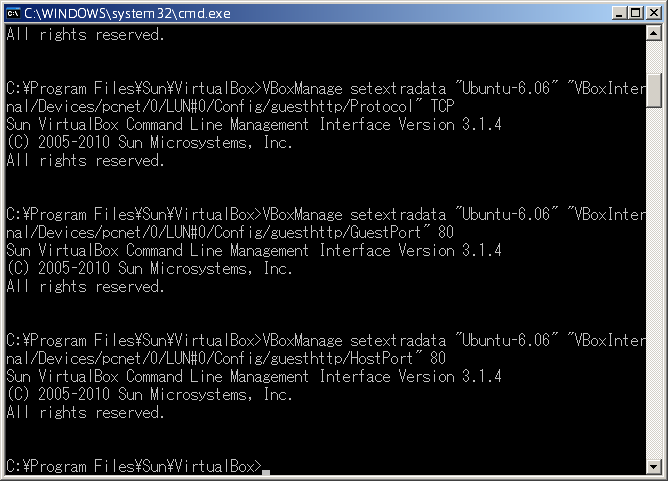
コマンドプロンプトが開いたら以下のコマンドを入力しVirtualBoxのインストールフォルダに移動します。
cd "C:\Program files\Sun\VirtualBox"
インストールフォルダに移動したら次の6つのコマンドを入力します。
VBoxManage setextradata "Ubuntu-6.06" "VBoxInternal/Devices/pcnet/0/LUN#0/Config/guestssh/Protocol" TCP
VBoxManage setextradata "Ubuntu-6.06" "VBoxInternal/Devices/pcnet/0/LUN#0/Config/guestssh/GuestPort" 22
VBoxManage setextradata "Ubuntu-6.06" "VBoxInternal/Devices/pcnet/0/LUN#0/Config/guestssh/HostPort" 22
VBoxManage setextradata "Ubuntu-6.06" "VBoxInternal/Devices/pcnet/0/LUN#0/Config/guesthttp/Protocol" TCP
VBoxManage setextradata "Ubuntu-6.06" "VBoxInternal/Devices/pcnet/0/LUN#0/Config/guesthttp/GuestPort" 80
VBoxManage setextradata "Ubuntu-6.06" "VBoxInternal/Devices/pcnet/0/LUN#0/Config/guesthttp/HostPort" 80
このコマンドによって先ほど作成したホストOSの22番ポートがゲストOSの22番ポートにポートフォワーディングされました。また、
別の仮想マシンを作成する際には
これでポートフォワーディングの設定は完了です。
仮想マシンをバックグラウンドで起動する
最後にバックグラウンドで仮想マシンを立ち上げる環境を整えます。
Ubuntu-6.
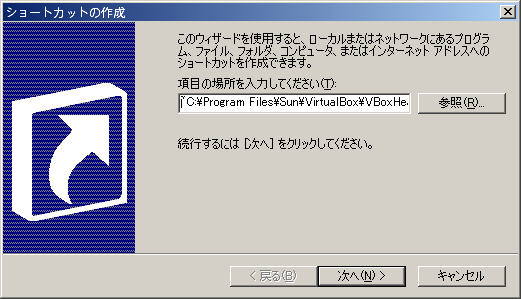
"C:\Program Files\Sun\VirtualBox\VBoxHeadless.exe" -startvm "Ubuntu-6.06"
作成したショートカットを開くとコマンドプロンプトが立ち上がり、
コマンドプロンプトが表示され続けているのが邪魔な場合、
SSHクライアントを用意する
最後に、
通信するデータは暗号化されますので安全ですが、
SSH にはいくつかの認証方法があります。その中でも公開鍵認証が一番安全ですが準備には手間がかかりますので、
一般的なルータではデフォルトで22番ポートは閉じていますが、
- ポートチェック
【外部からポート開放確認】 - http://
www. cman. jp/ network/ support/ port. html
SSHクライアントはお好みのものをお使いください。
本記事では例としてPuTTYjpを利用します。
- hdkの自作ソフトの紹介 | PuTTYjp
- http://
hp. vector. co. jp/ authors/ VA024651/ PuTTYkj. html
最新のアーカイブをダウンロードし、
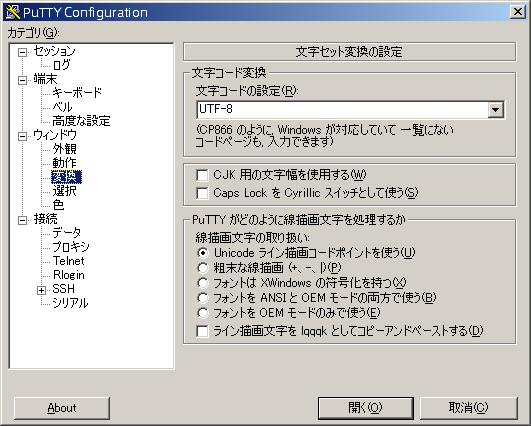
- ウィンドウ>変換
- 文字コードは
“UTF-8” を設定します。
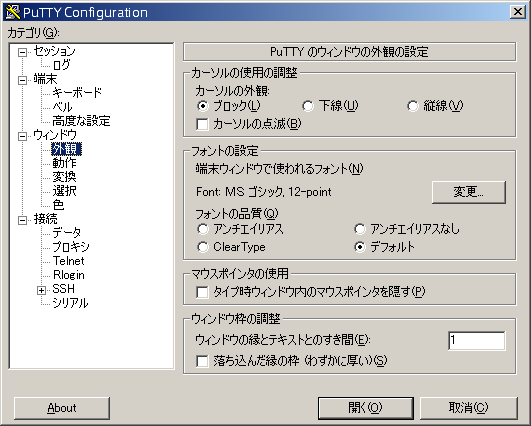
- ウィンドウ>外観
- UTF-8 に対応した等幅フォントを指定します。
- 例)MS ゴシック
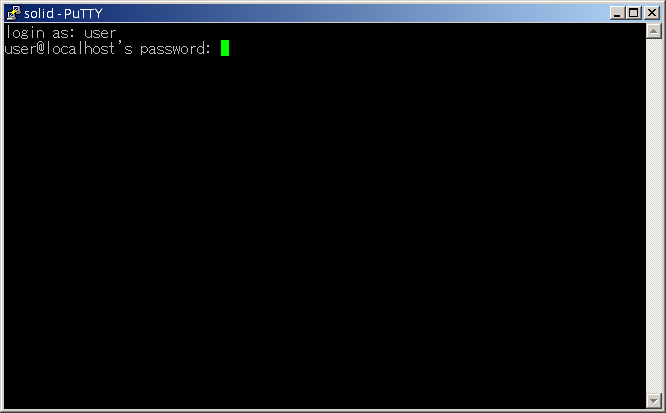
セッションに戻り、
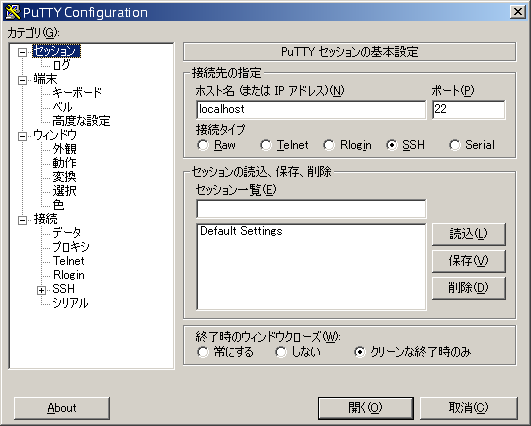
すべての設定が完了したら、
セッションの保存が完了したら
初めて接続するホストの場合、
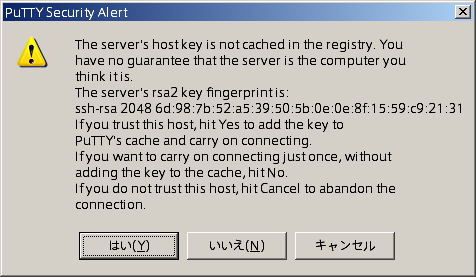
接続しますとこのような画面が表示されますので、
このように表示されたらログインは完了です。
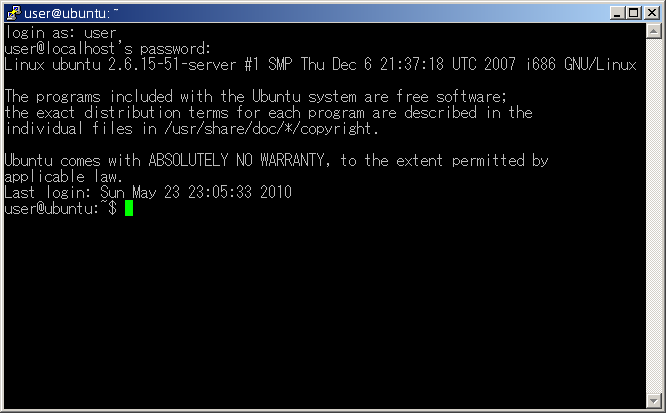
以上で、